Fig 11 French move 2
The French player sees an
opportunity to catch the Austrians off guard and seizes the moment. He rushes
his HQ across the board towards his right flank and drives his infantry
forwards off the hill towards the lone Austrian infantry unit. He dices for his
Artillery and Cavalry from his right most reinforcement point and gets them
both! They too dash forward. Note how far forward the cavalry has reached, that
is because it costs zero movement points to enter the board and the cavalry
unit was places square with its back facing to the edge of the board. Then it
moved forward 5”
The Austrian player chooses not
to shoot his threatened infantry unit as it would pin him and prevent him from
moving.
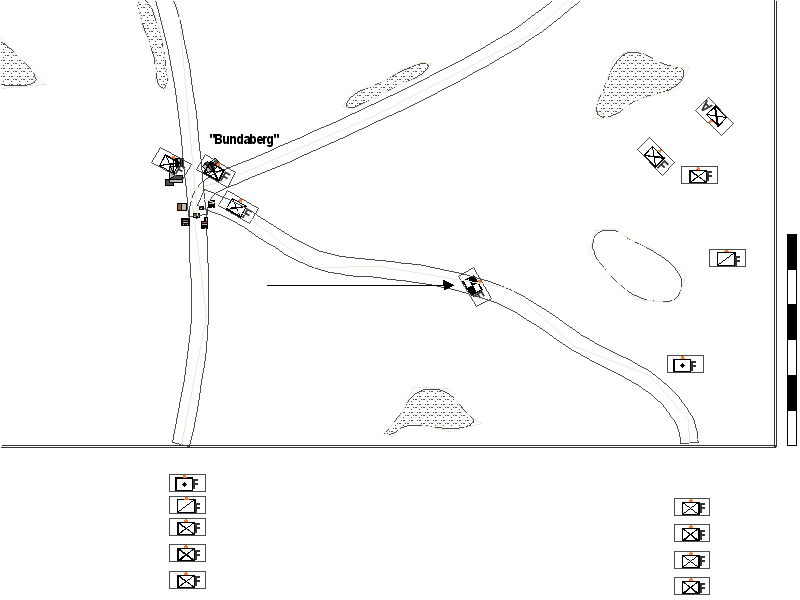
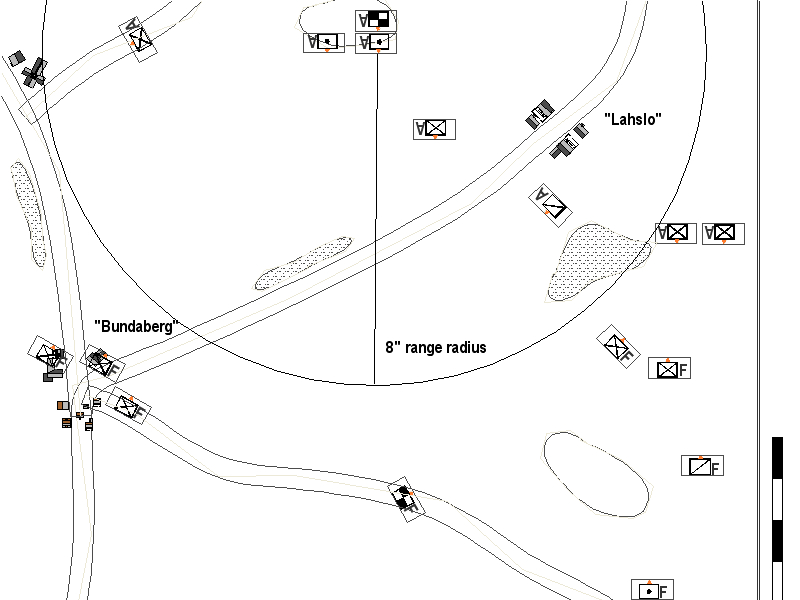
Fig 12 Austrian move 2
First the Austrian player
rolls to see if his infantry will arrive from the flank, he rolls a 4 and it
does! He then places the infantry at the edge of the board and brings back his
first unit to form a neat line covered by the woods. Next he gambles and
decides to see if his 1st flank heavy cavalry unit will arrive, a 5! He brings it on and
sends it galloping around the wood.
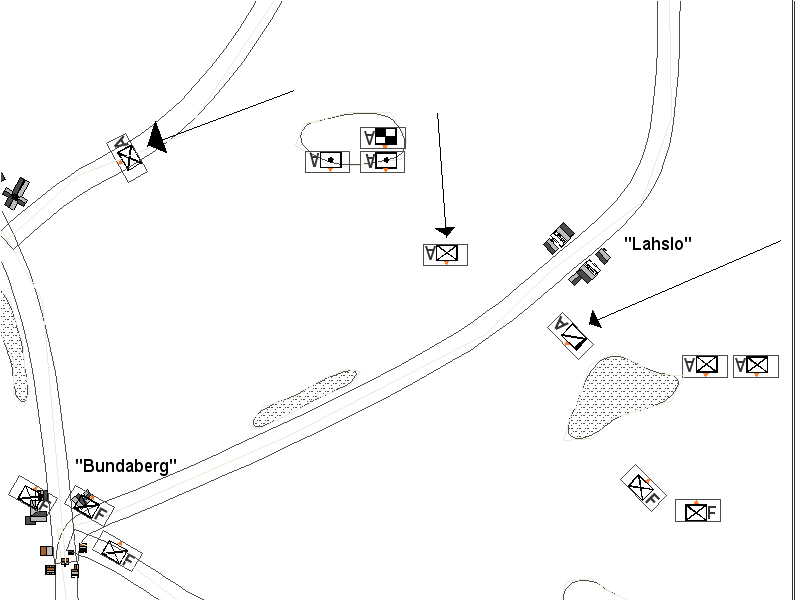
Fig 12a
Next he sets up his artillery on the central hill, and splits his two infantry one to the right flank and one to
the left. He places his HQ in base to base contact with one artillery unit so
it will receive a +1 when firing. The Austrain general can note with grim pleasure how his
artillery can lay down fire on much of the central board.
The French player has no
targets at which to shoot in his shooting phase.